
Enmasse overview - export and import Zato configuration, GitOps
Export and import environment configuration as YAML across dev, test and production.
Overview

Enmasse is GitOps for Zato - it keeps the whole environment in git as YAML. You use it to export or import all of your server definitions, such as REST, GraphQL, SQL connections, scheduler and security definitions, or any other object. The file name for such imports and exports is "enmasse.yaml", so when working with Zato you talk about "importing enmasse" or "exporting enmasse". But remember, "enmasse" is just a YAML config file, straightforward to use.
The enmasse workflow is this:
During development, developers use the Dashboard GUI to define new elements, e.g. it is usually convenient to fill out a form to have a new REST channel available.
When a solution, or an incremental part of it, is ready for wider testing, an enmasse file is exported from the development server to import it to a test server.
Afterwards, the same enmasse export file can be used to configure production servers.
The workflow loop now returns to developers who keep using Dashboard to add new server elements.
All of the export and import steps can be part of CI/CD pipelines that automate the provisioning of Zato environments
Anything that can be declared with the Dashboard GUI can be also exported or imported with enmasse. For instance, in the screenshot below a new REST channel is being defined.
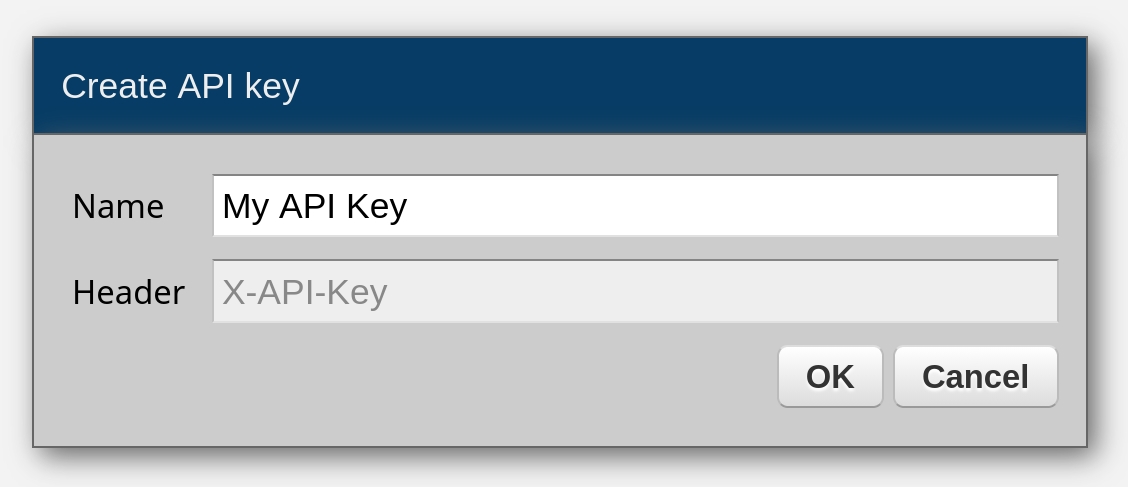
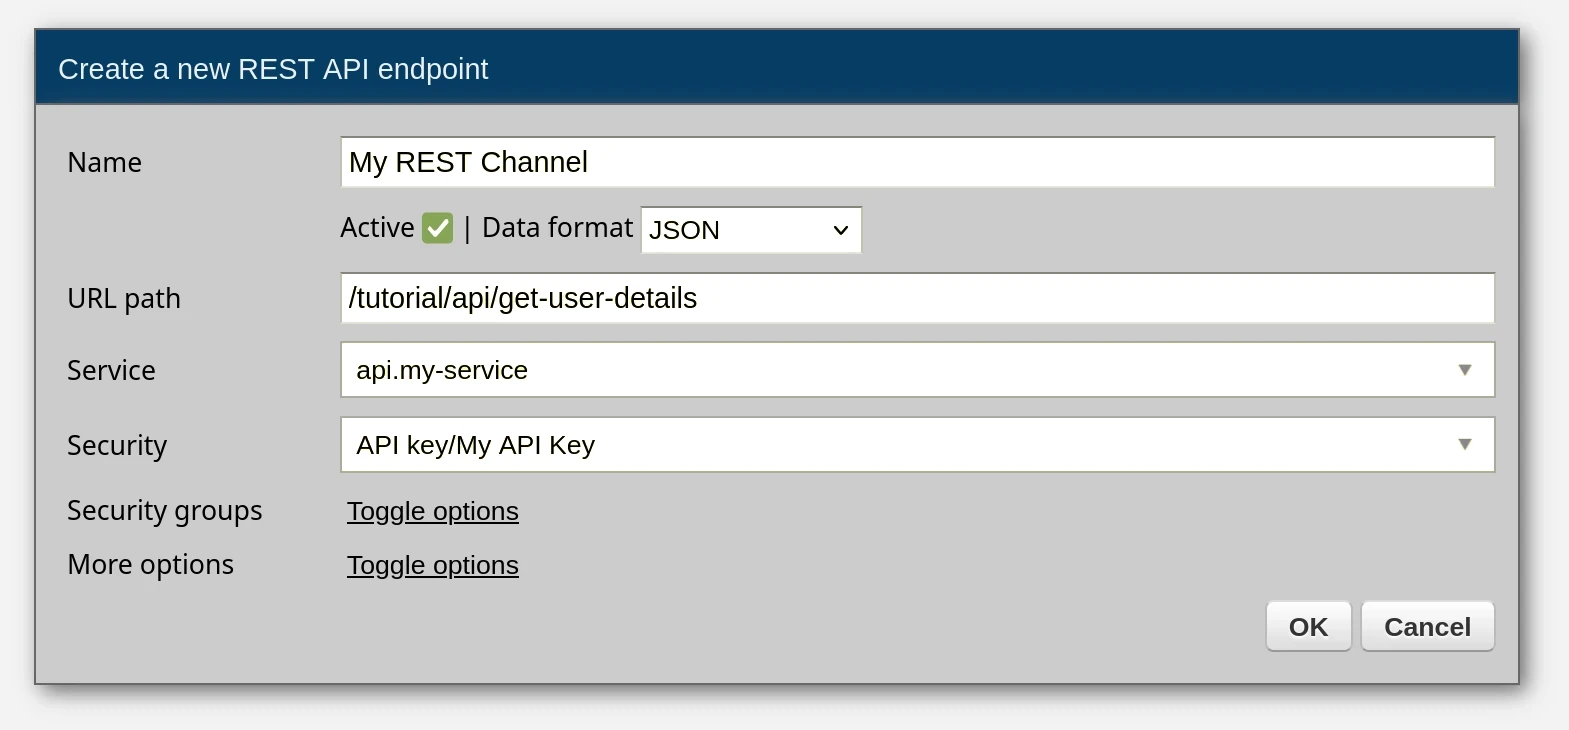
Now, enmasse can be used to export such an API key and REST channel to YAML and you will be able to import it later on.
security:
  - name: My API Key
    is_active: True
    type: apikey

channel_rest:
  - name: My REST Channel
    service: demo.input-logger
    url_path: /api/my/rest/channel
Such export files can be stored in a git repository. Iteratively, developers add new definitions to the file based on the current state of their work. Over time, the file will contain each definition, e.g. each REST channel and other connection types, that are needed to configure a particular project or solution.
To prevent any potential leakage of sensitive information, enmasse will not export any passwords from servers to the YAML file. Yet, it is always possible to add passwords to your enmasse files via environment variables, as described later in this chapter, so that you will be still able to recreate fully each definition with passwords where they are needed.
An enmasse file contains configuration only, it does not contain services that the configuration may depend on. Any such services need to be deployed before enmasse imports your configuration file.
You do not need to create an object in Dashboard before it can be added to an enmasse file. With many similar REST channels or security definitions, differing only in small details, create one in Dashboard, export it to see what its enmasse format looks like, and write the remaining definitions in the file directly.
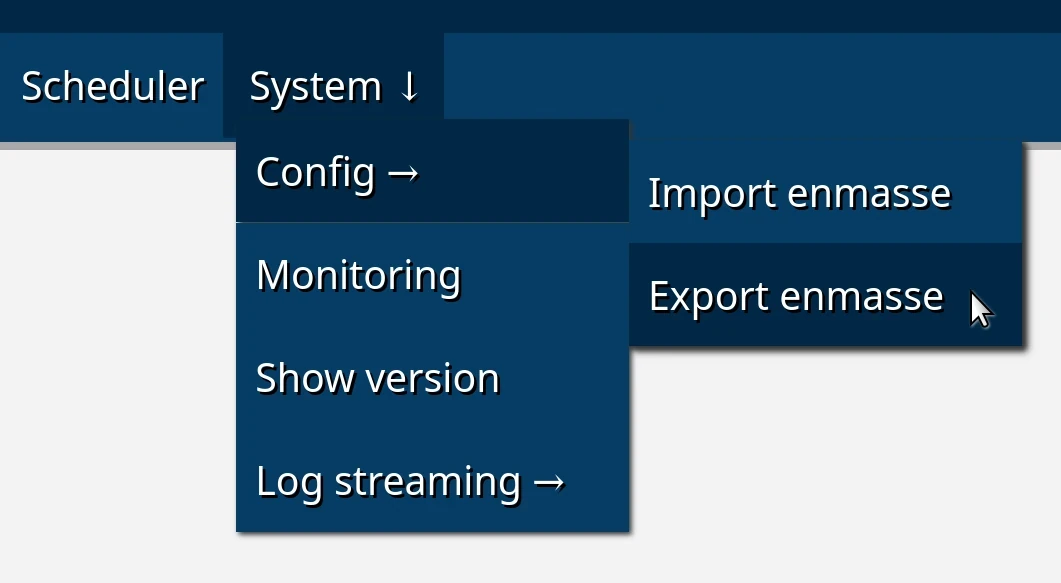
How to export enmasse
- In your Dashboard, click
System → Config → Export enmasseand your server configuration will be exported toenmasse.yaml.
How to import enmasse
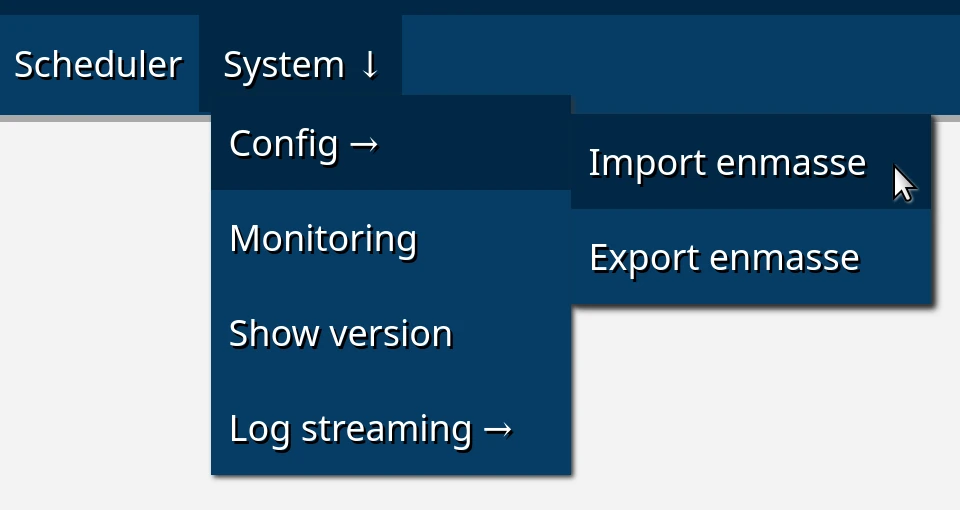
- In your Dashboard, click
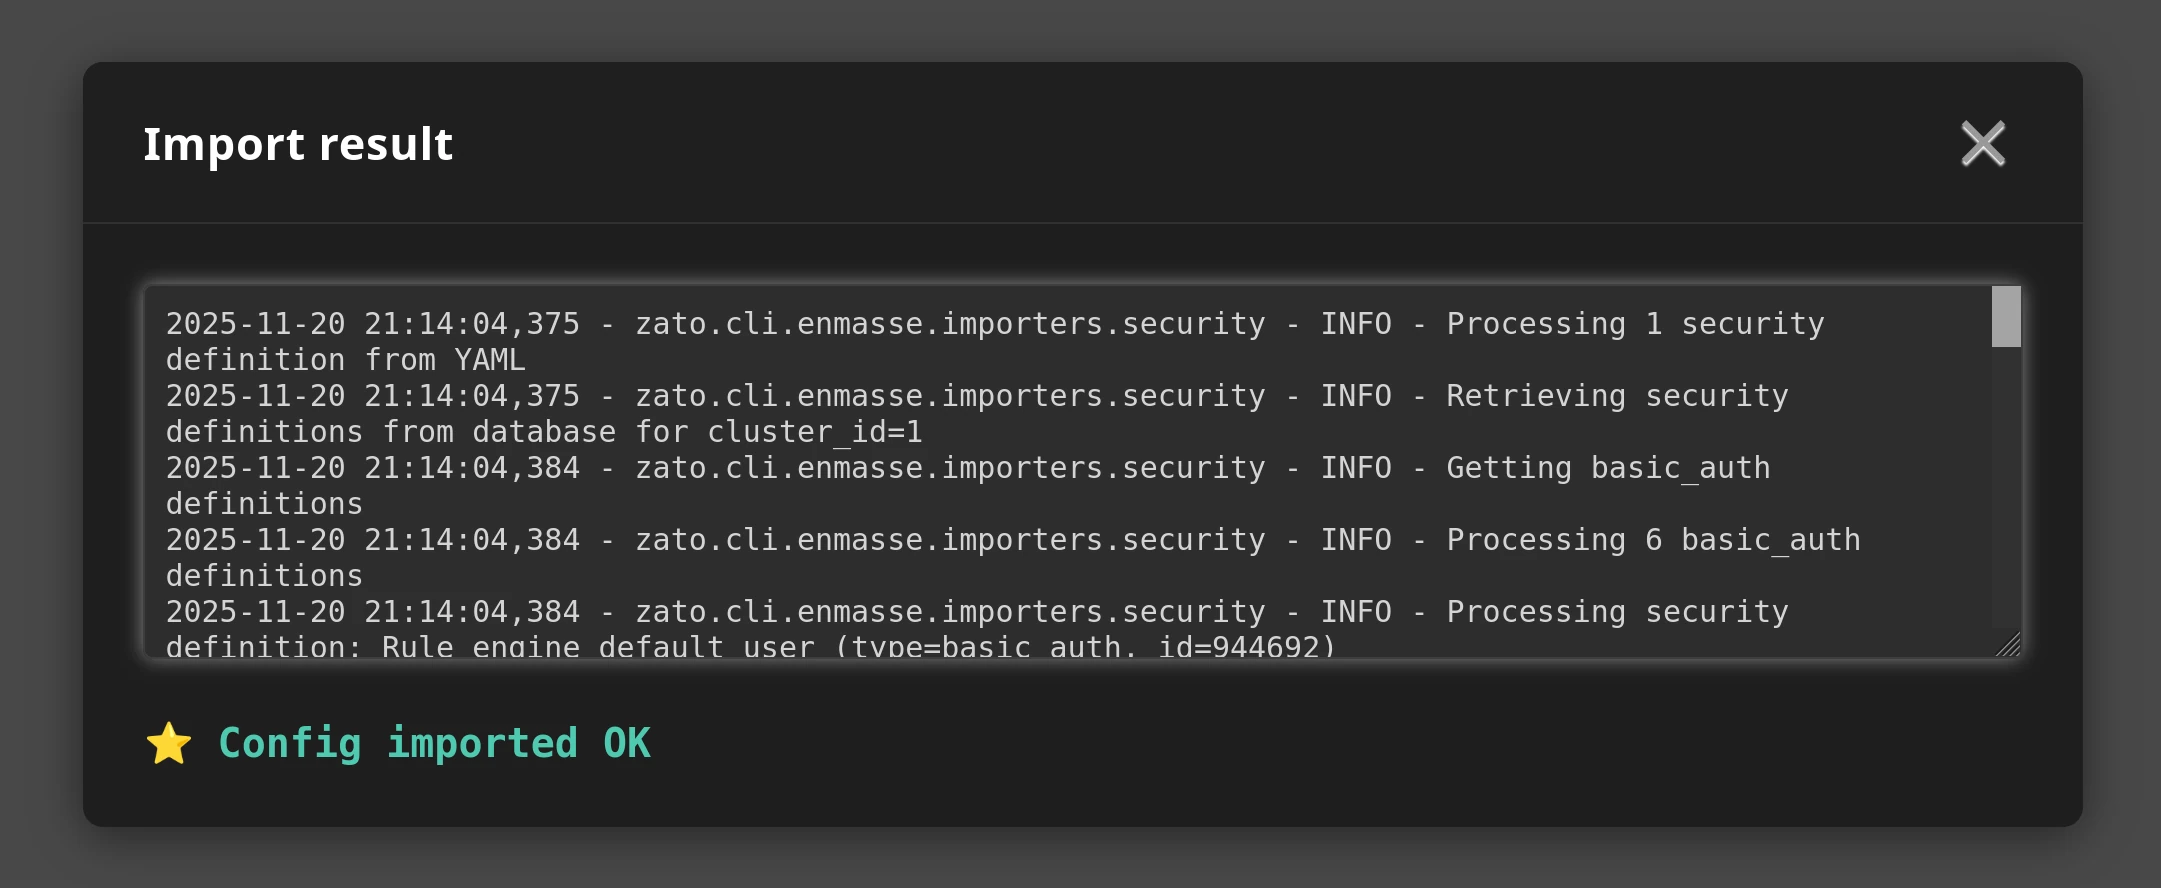
System → Config → Import enmasseand select the file to import.
- To automate the import process, mount your enmasse file under
/opt/hot-deploy/enmasse/enmasse.yamlinside the container - best using the blueprint project described fully in the DevOps guide
Deleting objects
An item with should_delete: true deletes the object it names instead of creating or updating it. The key is accepted in every section of the file, with the same effect as deleting the object in the Dashboard - whatever depends on the object goes with it. Deleting a security definition removes the channels, outgoing connections, pub/sub permissions and subscriptions that use it, deleting a topic removes a subscription left without topics, and deleting a connection removes the scheduler jobs that were created for it.
channel_rest:
  - name: orders.v1
    should_delete: true

pubsub_subscription:
  - security: partner.api
    should_delete: true
- An item is matched by
name, or bysecurityfor pub/sub permissions and subscriptions, and no other field is read. - Deletions run before anything in the file is created or updated, so a channel can be deleted and another one created on the same URL path in one file. Quota tiers are the exception - they are deleted after the create and update step, because a tier cannot be deleted while a security definition, a group or a channel still references it, and the file removes such references during that step.
- An object that does not exist is skipped and the import continues.
- A file that both deletes an object and refers to it elsewhere - a channel whose
securityis a definition the same file deletes, a group whosememberslist one - is refused as a whole and nothing is imported. alert_rulesandalert_notificationsdo not accept the key, because their items are settings of other objects rather than objects of their own.- Deleting objects requires a running server, as the deletion goes through the same services the Dashboard uses.
Automatic imports
Two kinds of automatic imports exist, and together they mean that no environment ever needs a manual import:
- At startup - a file mounted under
/opt/hot-deploy/enmasse/enmasse.yamlis imported each time the container starts, so a freshly created container comes up with all its channels, connections and security definitions already in place - On change - enmasse files inside a mounted project - any file whose name contains
enmasseand ends in.yamlor.yml- are imported automatically whenever they change, as part of hot deployment, so editing the YAML in git and letting the mount propagate it is a complete deployment mechanism on its own
Allow the startup import to complete before the container's startup probe expires. Configure the wait in the Kubernetes startupProbe or the Docker Compose start_period; health checks provides complete examples for both.
- If you notice that enmasse takes longer than a few seconds to complete - in the Dashboard, when you see the "Importing" spinner for a longer time - this indicates that one of your services is missing. For instance, your enmasse definition says that a REST channel should be created for service "api.my-service2" but this service is not currently deployed, or perhaps there's a typo in its name, and enmasse will keep waiting for such a service. Deploy the expected service or correct its name and enmasse will continue, or alternatively, import the corrected enmasse file again.
Environment variables
When enmasse runs, it can read environment variables and replace selected parts of a file to be imported based on what is found in the environment.
Passwords and other types of credentials are what environment variables are usually used for but it is possible to use them with any values in enmasse files.
A value is read from the environment when the whole value is a reference - either with the "Zato_Enmasse_Env." prefix, as in the example below which reads a password for this security definition from a variable called "My_Token_Password" which must exist in the same system where enmasse runs ..
security:
  - name: My.Token
    username: api
    type: bearer_token
    password: Zato_Enmasse_Env.My_Token_Password
.. or with the ${VAR} form, which reads the variable of that exact name:
Both forms replace the whole value only - a reference cannot be embedded inside a longer string.
Variables passed to a container with -e or in the environment section of a Docker Compose file are available to Zato when their names start with Zato_, e.g. Zato_My_Token_Password. The env.ini file provides variables of any name. Consult the full DevOps tutorial for more information how to pass environment variables to your Zato containers.
If a variable is not set, enmasse logs a warning with the variable's name during the import and the value is replaced with Missing_ followed by that name, e.g. Missing_My_Token_Password_3f2a9c1b7d4e. A security definition or a connection keeps its current password, and a new one receives a generated one. To resolve it, set the variable and import the file again.
Splitting a file into includes
One enmasse file can pull in others through the include key - useful when one team maintains security definitions and another is responsible for channels, or when a shared base is reused across environments.
include:
  - security.yaml
  - channels/rest.yaml

scheduler:
  - name: My.Job
    service: my.service
    job_type: interval_based
    minutes: 30
- Relative paths are resolved against the directory of the file that includes them
- Included files can have
includekeys of their own - the mechanism is recursive - A file that includes itself, directly or through a chain, is an error and the import stops
- All the included files are merged into one configuration before anything is imported
Workflow again
- Use the Dashboard to add your definitions, such as REST channels, etc.
- Click
System → Config → Export enmasseto export them once or more - Keep adding them to your git, along with your environment variables for passwords
- Configure your container to read the enmasse file when it's starting up (check the DevOps guide for details)
- Alternatively, import enmasse manually by clicking
System → Config → Import enmasse
Enmasse reference
All available options for each object type are described in the enmasse reference page.
Read more
- The enmasse reference lists all available options for each object type
- Configuration, enmasse and backups explains what belongs in enmasse, what belongs in config tables and what a backup is actually for
- This complete DevOps tutorial discusses how to your services and projects
- Connection types you build yourself with the Connector SDK are managed with enmasse too - each type gets a
custom_key, e.g.custom_crm, whose options are the fields the connector declares